Tuesday, August 9, 2016

Peek-a-Boo Pattern Shop Vitality Racerback Shaped Back Opening Hack

For the back of the night dress in the previous post I decided to do a little experimenting with the back.   I made a half circle shaped opening to change up the simple style a little bit.

This is what it looks like:  (my scissors are labeled fabric yet "someone" still used them to hack up cardboard or something else equally horrifying!)


This is actually pretty easy to add and you can do any shape you want (I was thinking of doing a star, but decided not to push my luck sewing in the middle of the night!) 

First, assemble the Vitality Racerback as instructed in the pattern.   Get the bra sewn, and the tank, but stop before basting them together.

Next figure out what shape you want, I just cut a piece of paper and laid it out until I liked it.   This "pattern" will be the exact size of your hole when you are done, so no need to add seam allowance or anything like that.


Trace the pattern piece on the right side of the bra (in the next steps I switched this because I prefer the bra hem inside out).     I just use washable crayola markers for sewing patterns, they are cheap, wash out easy, and they are all over the house!


Layer the bra over the tank lining up the arm and neck openings.   The WRONG side of the bra touching the RIGHT side of the tank (remember I switched my bra inside out here).

Pin all over the place, my pinning looks crazy because this fabric is super soft and moves all over the place - you want to put enough pins that the two layers line up, and around your "hole" shape so that stays still while you sew.


Now take it to your machine and stitch right on the line you drew.   Make sure you pivot the fabric at any corners to make them nice and neat.   Remove pins as you go if they are poking you, and be careful not to catch any random bits of fabric in there from underneath.

Take all the pins out when its sewn.


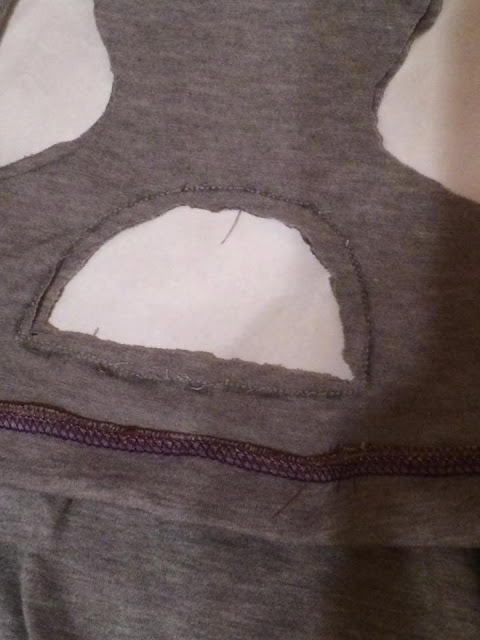
Next, try and find some sharp scissors that nobody ruined, and cut out your "hole" leaving a seam allowance on the inside.   At corners, clip a little "v" shape so it lays flat when you turn it.

See how well my scissors work?


Now take the bra and stuff it through the hole.  Prod it as necessary to get everything to lay flat, and then press.    Next topstitch around the edge of the hole, this helps it to stay flat although you can skip this if your fabric seems to be cooperating without it.

My soft fabric doesn't like to lay flat for pretty pictures.


But thats ok, because when you put it on, it lays how it should!


It took way too many tries to get this picture so its kinda blurry, its much easier when I can get the kid to take pictures of my back!


Ta-dah!   A fun twist on the Vitality Tank!


Links are affiliate links! 

Peek-a-Boo Pattern Shop Vitality Racerback Nightdress Hack

So for whatever reason, Levi decided to wear my nightdress.   And when I pulled it out of the wash I found this: 


He ate it!   The weirdo kid literally ate the sleeve of my nightdress.  

I was making a birthing gown for a customer and really liked how soft the fabric was, so I bought extra for myself, so I could make a replacement.

I used the Peek-a-Boo Pattern Shop Vitality Racerback Tank (which I tested a while back), as my basis.     The pattern comes with a tank, sports bra, or combo of the two.   There is also a maternity add-on you can get.

I modified the pattern a bit to get a simple A-line dress.

First, I figured out how long I wanted it to be.   I wasn't too worried about an exact length so just held the measuring tape where I thought the neckline would start and measured to about my knees.  
Next, if you want a specific width for the hem, figure out what you want that to be and divide by 4.    I just eyeballed it sense this is pj's.

Fold the fabric in half, and put the bra pattern piece on the fold.   Measure the length going down the fold and mark.   Then measure the width (remember its 1/4 what you want it to end up), across the bottom.     Last draw a line from the "armpit seam" down to the hem.   This will be an "A" shaped line and will be wider than the bottom of the bra pattern piece.

Cut it out.

For the back, use your front that is cut out as a pattern piece - line up the armpit seam and cut the skirt portion, then put the back pattern piece on and cut that out.   This way the skirt bit will match front and back.

Cut the bra part out as instructed in the pattern, if you want to include it.


Now follow the pattern!   Its the same as making the "tank with built in bra" option, with the exception of the side seams being longer.

Ta-dah!   An easy and comfy nightdress, ready for bed!


Links are affiliate links