Showing posts with label sewing projects. Show all posts

Saturday, June 24, 2017

Making Clothes Unique with Fun Details

Boys clothes can be really boring, but its easy to add fun details to make something unique and interesting.    I've noticed that most sewing patterns are overall the same thing with variations on details, so instead of buying pattern after pattern to get different looks, I choose a well fitting pattern that already comes with a few variations, and then add all kinds of details to get different looks.    For this pair of shorts, I added several details to make a boring basic pair of red shorts into something special that you will never see in stores.    You don't have to add all of these different details on one piece of clothing, sometimes I just pick one or two and that is enough to make it more interesting!

For these shorts, I used the Linden Shorts by Sew a Little Seam.    This is a shorts and skirt pattern that I tested a while back.  I like it for its multiple finishing options, 2 lengths, multiple waistband options, and recently a new set of "extras" came out like cargo pockets, a real fly, and a board shorts option!
I made size 8, which is a bit big on Levi, so these should last him a while if he doesn't destroy them.   Fabric is corduroy, some cotton woven scraps, and I did a simple knit waistband.  

Front:


Back:


The details:

Fun stitching:   For the pockets, instead of a simple straight stitch, I chose this uneven wave stitch.   My machine has lots of different stitches so why not play around with them!


Ribbon: 
This is something I almost always add -  on back pockets of shorts/pants, button down shirt front pockets, side seams of shorts and shirts (on t-shirts put it near the bottom of the shirt), etc.     I cut a small scrap of one or two ribbons, fold in half, and tuck into the seam or like in this example, under the edge of the pocket.   This gives a little pop of color and another fun detail.     Sometimes I use twill tape instead of ribbon and sew a tiny little button onto the tab, I love buttons too!
Another fun one is to cut a small strip of ribbon, turn the ends under and stitch the short ends down, I most often do this one at the bottom of the back yolk on button down shirts, or at the bottom of a pocket.  

Topstitching: 
I like to topstitch everything!  Not only does it make clothing more durable, but it can add a bit of fun color as well.    If you match your fabric, it hides the stitching, so I prefer to use contrasting colors.   I also sew up some of the project and then switch to another color.    You can see here that I used yellow first and then switched to green to finish.  


Buttons: 
Speaking of buttons...    On this pair I added buttons to the back pockets, if your machine is cooperative with button holes (which my new machine thankfully is), then adding buttons is a quick easy add on.     I often let the kid choose a button or two to add.    On this pair I added one to the front as well.   Sometimes I put them on the bottom corner of a pocket as a little detail.   A group of buttons placed somewhere can be fun as well.  

Patches:
Also shown here are patches.   For these, I sometimes do raw edges, sometimes applique them on (a tight zigzag stitch around the edge, and sometimes use a quilters applique technique like I did here.   For this method, take 2 squares (or circles, triangle, rectangles, etc) and sew them right sides together, all the way around with no gap.    Then, clip the corners, and cut a generous snip through the middle of ONE layer and turn everything inside out.   The snip will be hidden underneath when you sew the patch down, use any stitch you want to sew on the patch!


Stitching as detail: 
On pockets in particular, but sometimes randomly across a leg of shorts or some other random place, I do a line of stitching.   Here I used the same "wave" stitch to do a line across the back pocket before turning the edges under and attaching it.     I also added TLSS (The Little Sewing Shop) on the pocket (branding!)


Fun pockets: 
The Linden shorts have a bunch of pocket options, but not zips.   I saw these on a pair of mini boeden shorts and used that as inspiration.   Experiment with different pocket shapes and mix it up!   You can do can do different pockets on each side, like a patch pocket on the right and a regular pocket on the left.  Or a square back pocket and a pointed one, or one with a flap and another without....  
Try unusual shapes too, Max California has a tutorial for a fun dripping pocket for example.   I save inspiration for fun pockets on my pinterest like this and this.    There are tons of ideas out there!


This is another example of Fun Stitching, I used an "x" shaped stitch to topstitch the pocket shape.  


Hope that gives you some inspiration to add fun details!  

Here are the finished shorts:


Sunday, June 4, 2017

Swimwear sewing!


Levi needed new swimwear (again) and I found a good deal on fabric so bought a bunch.  I was also offered the opportunity to test a couple sewing patterns from Made By Jack's Mum, one of my favorite pattern designers.   I used the Sunshine Romper for the one-piece suits and the Reef Beach Rashie  for the tops.    For the jammers, I used a pattern from Ottobre, from the Summer 2016 issue.  And lastly, for the speedos, I used a free pattern from Boo! Designs.


This is the Sunshine Romper with some modifications as requested by Levi.   First I chopped off the sleeves and hemmed the arm opening, making it sleeveless.   I used the regular neck band piece to make the neck band and brought the zip right up to the top of it.   I used a fold over method on the zip guard to protect his chin from the toggle.   I like this method best because it gives full coverage and a nice looking finish, and its not difficult or fiddly to do.


This is the basic version of the Reef Beach Rashie and Ottobre jammers.   I appliqued "swim" and added a freezer paper stencil for the shadow, because I can't leave anything plain! 


Super basic ottobre jammers, I got rid of the side stripe here and made them extra tight "so they don't fall off when I dive mom".    


This is the Sunshine romper with a little bit of modification for the zipper.  I added a chin guard at the top of the zip guard by lengthening it a little bit and folding it over the top of the zipper.  This keeps the "stopper" from rubbing his chin.   I also used the pattern piece for the non-zip style giving it square edges at the opening of the zip.     He picked this fabric, and its awfully crazy but I will easily be able to spot him on the beach!     I love that its full coverage for minimal sunscreen use, but the pattern also comes in 3/4 and short lengths for sleeves and legs.


These are the Boo! Design speedos, perfect for swim team (and using scraps) 


This is the Reef Beach Rashie and Ottobre jammers.   Here I mostly stuck with the pattern for the construction of the neckline, but did add the fold over zip guard.    The patterns curved neck piece makes it a bit tricky to get things even.   This is my favorite fabric, but not great for the ocean because blue is hard to see in the water!  

I still have more fabric to use, but this should keep him swimming for a while!  

Tuesday, August 9, 2016

Peek-a-Boo Pattern Shop Vitality Racerback Shaped Back Opening Hack

For the back of the night dress in the previous post I decided to do a little experimenting with the back.   I made a half circle shaped opening to change up the simple style a little bit.

This is what it looks like:  (my scissors are labeled fabric yet "someone" still used them to hack up cardboard or something else equally horrifying!)


This is actually pretty easy to add and you can do any shape you want (I was thinking of doing a star, but decided not to push my luck sewing in the middle of the night!) 

First, assemble the Vitality Racerback as instructed in the pattern.   Get the bra sewn, and the tank, but stop before basting them together.

Next figure out what shape you want, I just cut a piece of paper and laid it out until I liked it.   This "pattern" will be the exact size of your hole when you are done, so no need to add seam allowance or anything like that.


Trace the pattern piece on the right side of the bra (in the next steps I switched this because I prefer the bra hem inside out).     I just use washable crayola markers for sewing patterns, they are cheap, wash out easy, and they are all over the house!


Layer the bra over the tank lining up the arm and neck openings.   The WRONG side of the bra touching the RIGHT side of the tank (remember I switched my bra inside out here).

Pin all over the place, my pinning looks crazy because this fabric is super soft and moves all over the place - you want to put enough pins that the two layers line up, and around your "hole" shape so that stays still while you sew.


Now take it to your machine and stitch right on the line you drew.   Make sure you pivot the fabric at any corners to make them nice and neat.   Remove pins as you go if they are poking you, and be careful not to catch any random bits of fabric in there from underneath.

Take all the pins out when its sewn.


Next, try and find some sharp scissors that nobody ruined, and cut out your "hole" leaving a seam allowance on the inside.   At corners, clip a little "v" shape so it lays flat when you turn it.

See how well my scissors work?


Now take the bra and stuff it through the hole.  Prod it as necessary to get everything to lay flat, and then press.    Next topstitch around the edge of the hole, this helps it to stay flat although you can skip this if your fabric seems to be cooperating without it.

My soft fabric doesn't like to lay flat for pretty pictures.


But thats ok, because when you put it on, it lays how it should!


It took way too many tries to get this picture so its kinda blurry, its much easier when I can get the kid to take pictures of my back!


Ta-dah!   A fun twist on the Vitality Tank!


Links are affiliate links! 

Peek-a-Boo Pattern Shop Vitality Racerback Nightdress Hack

So for whatever reason, Levi decided to wear my nightdress.   And when I pulled it out of the wash I found this: 


He ate it!   The weirdo kid literally ate the sleeve of my nightdress.  

I was making a birthing gown for a customer and really liked how soft the fabric was, so I bought extra for myself, so I could make a replacement.

I used the Peek-a-Boo Pattern Shop Vitality Racerback Tank (which I tested a while back), as my basis.     The pattern comes with a tank, sports bra, or combo of the two.   There is also a maternity add-on you can get.

I modified the pattern a bit to get a simple A-line dress.

First, I figured out how long I wanted it to be.   I wasn't too worried about an exact length so just held the measuring tape where I thought the neckline would start and measured to about my knees.  
Next, if you want a specific width for the hem, figure out what you want that to be and divide by 4.    I just eyeballed it sense this is pj's.

Fold the fabric in half, and put the bra pattern piece on the fold.   Measure the length going down the fold and mark.   Then measure the width (remember its 1/4 what you want it to end up), across the bottom.     Last draw a line from the "armpit seam" down to the hem.   This will be an "A" shaped line and will be wider than the bottom of the bra pattern piece.

Cut it out.

For the back, use your front that is cut out as a pattern piece - line up the armpit seam and cut the skirt portion, then put the back pattern piece on and cut that out.   This way the skirt bit will match front and back.

Cut the bra part out as instructed in the pattern, if you want to include it.


Now follow the pattern!   Its the same as making the "tank with built in bra" option, with the exception of the side seams being longer.

Ta-dah!   An easy and comfy nightdress, ready for bed!


Links are affiliate links

Friday, May 27, 2016

Pattern Review: Love Notions Tidal Tank and Top

I test a lot of sewing patterns, but the vast majority of the time they are clothes for Levi.   I rarely sew for myself, but lately I've had the opportunity to test a few women's patterns.    This is one that I really like and plan on making more of.  


Pattern Description: Love Notions:   Tidal Tank and Top 
Comes with 3 lengths (top, knee and maxi), short sleeves, sleeveless or tank.     I learned that "tank" and "sleeveless" mean different things, "tank" is the narrower straps, and "sleeveless" is fuller coverage straps.   Option of banded or bound neckline/arm holes. 
Pattern sizing: Comes in sizes XS-XXXL.   I made the size small.  There are also instructions for a full bust adjustment.  
Did it look like the photo/drawing on the pattern when you were finished sewing? yes
Were the instructions complete and easy to follow?  Yes, this is a super quick and easy pattern to sew up
Fabric used: Pattern is for knit fabrics, but woven fabric can be used for the middle panel (still need to try that!).   I used knit fabric I found at a thrift store for one, and Joann knit for another.  
Did you alter the pattern in any way?  I shortened the first one (purple) by about 2" at the "lengthen/shorten" line included on the pattern.    On the floral dress I chopped 3" off the bottom before hemming because I forgot to shorten sooner.   
Was there anything you disliked or would change?  Nope, it is great the way it is.   The pattern went through 6 different changes in the testing group to make sure it was perfect. 
Would you sew it again?  Yes, I have the top version printed and am going to try that next, my mom also wants me to make her one.  
Would you recommend it to others?  Yes
Do you consider the pattern beginner/intermediate/advanced?  Beginner with a knowledge of sewing knits, its a super fast and easy pattern for me, but the bands or binding might be tricky for someone new to knits. 
Shirts/dresses: Were the sleeves cut on the on the fold?   I haven't made sleeves, but they are different front and back.  
Does the pattern include layers for easy printing?  yes 
Seam allowance used in the pattern  3/8" 
Is the pattern cut or no cut pages?  No trim pages

Overall, this is a great pattern.  It is really really fast to make, and very comfortable to wear - no side seams!  

Pattern can be bought here


Thursday, November 27, 2014

Thanksgiving 2014

Happy Thanksgiving! 

Levi and I are celebrating by doing NOTHING today  - my parents and sister aren't around, and its actually nice to not have any obligations for the day.    We are thankful for all of the offers to dinner today though, we had offers from friends (even willing to accommodate our special diets), and even my college professor, and a complete stranger.   How nice of everyone to ask!  


First is some Christmas sewing that I've been working on. 

For a swap: 


Christmas jammies for a friends boys (these are SO cute, I love this pattern!)


And what I'm thankful for:

Berkshire's 12th birthday, which the shelter we got her from says is about on thanksgiving, so a good day to celebrate it - you wouldn't know this do was so old (except for the greying muzzle), she is still active and sure does love to eat!   Levi made her a special hat to wear, and she got treats and a toy. 

And my family - And of course all those not pictured as well!   We are looking forward to spending time with Grammy for christmas, going on a family+ cruise!   

And Levi wanted to make a video (I said he should write down what he is thankful for, instead he made a list, practiced it, and then requested that I film him - he loves to make these videos, even though he does take it too seriously!)

Monday, April 1, 2013

Easter 2013

 Last week, Zach had no school, so he was with us more than usual.   This gave us the chance to do some fun art projects!  One of them was a great mixed media spring craft.    I think they came out really cute! 


These don't have to be strictly Easter, the birds could even be blue birds instead!  So here is a quick tutorial:

You need: 
  • elmer's glue
  • paint (brown, + whatever colors you want for your birds, we used orange/yellow)
  • tissue paper
  • brown paper
  • colored paper (bird colors and background color)
  • sticks/leaves/feathers etc.
  • scissors
  • toilet paper tube or similar
What to do:
  1. mix a squirt of elmer's glue, a squirt of brown paint and a little bit of water in a container.  
  2. scrunch the tissue paper and lay it on the brown paper.  Paint with a generous amount of the brown paint mixture, scrunching and laying out the tissue paper to make a textured look.  Let this dry.   Other thin papers will work too, even paper towels or toilet paper.  
  3. Meanwhile, use the toilet paper tube dipped in paint to print the circle shapes on colored paper.  Use the back of a paintbrush to dot on eyes, and glue triangle or diamond shaped scraps of paper on for beaks.    
  4. Go on a nature hunt and find some sticks and things while all that finishes drying!
  5. Cut a nest shape from the brown textured paper.  Cut out the birds leaving the paint circles inside your cut-outs.   Glue to a background.  Now decorate with your elements from nature.  
 That's it!   Hang up and enjoy. 

 Now, onto the Easter stuff.

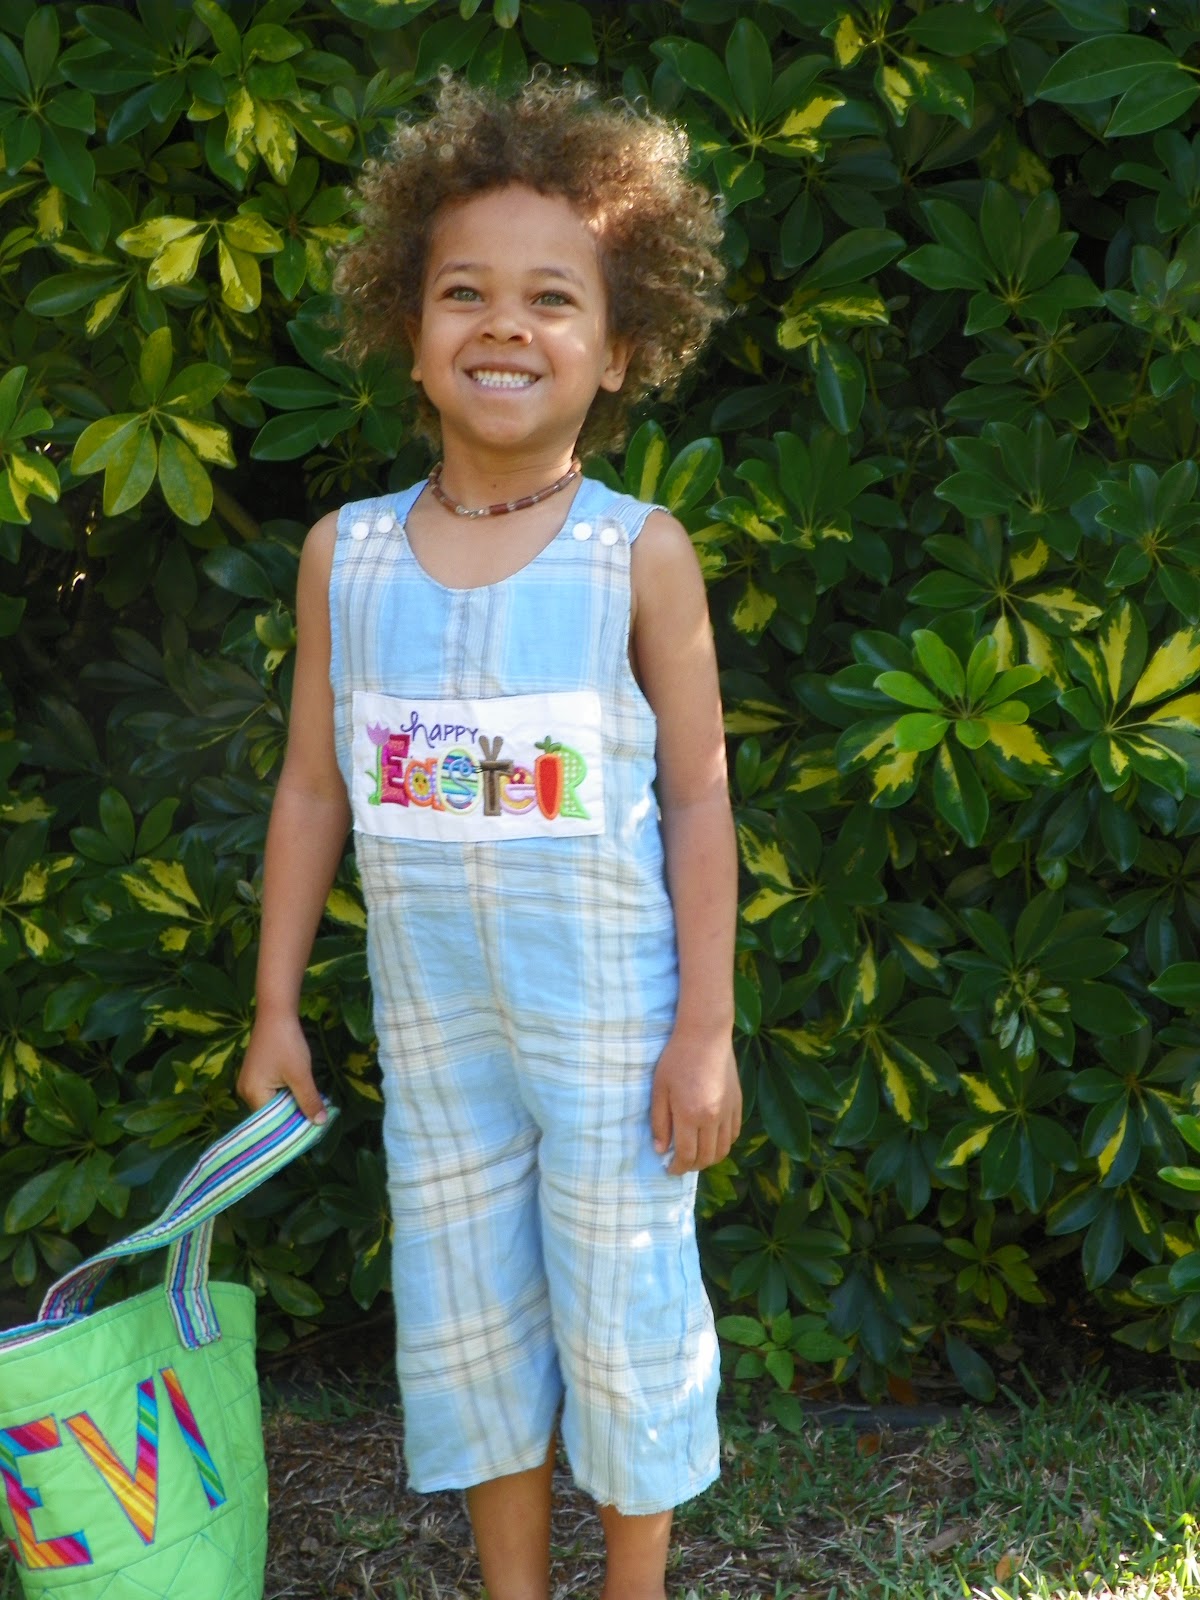
First, Levi got some new clothes (as usual).

A funny Easter shirt:

And a romper, this one is the St. Patty's one, reversed!  


We dyed eggs.  This year we tried out the liquid water colors as dye, they worked quite well, although the brown and black dyes were not very attractive.     (note that Nai Nai has her glass of wine, all set for egg dying!) 


Levi could not make a normal face for pics. 

Then the next day, he got to hunt for them, along with a zillion plastic eggs that we have collected from previous years egg hunts.   They were hidden outside in the front and back, and all over the house.   


We tried to go to an egg hunt at the park, it turned out to be a very graphic church service.   We had already attended our service at the UU church, so we skipped it, and caught a quick train ride on our way out. 

Levi's Easter basket had pinwheels, seeds for the garden, bubbles, egg shape chalk, a rainbow spinner, purple socks, and some putty that makes fart sounds (big hit!)

And his favorite, a fun glasses shaped straw!  He tested it out with some diluted cranberry juice (he doesn't do well with drinking actual juice, but I added a splash to make the water red, more fun that way!)


Happy Easter from The Little Sewing Shop!